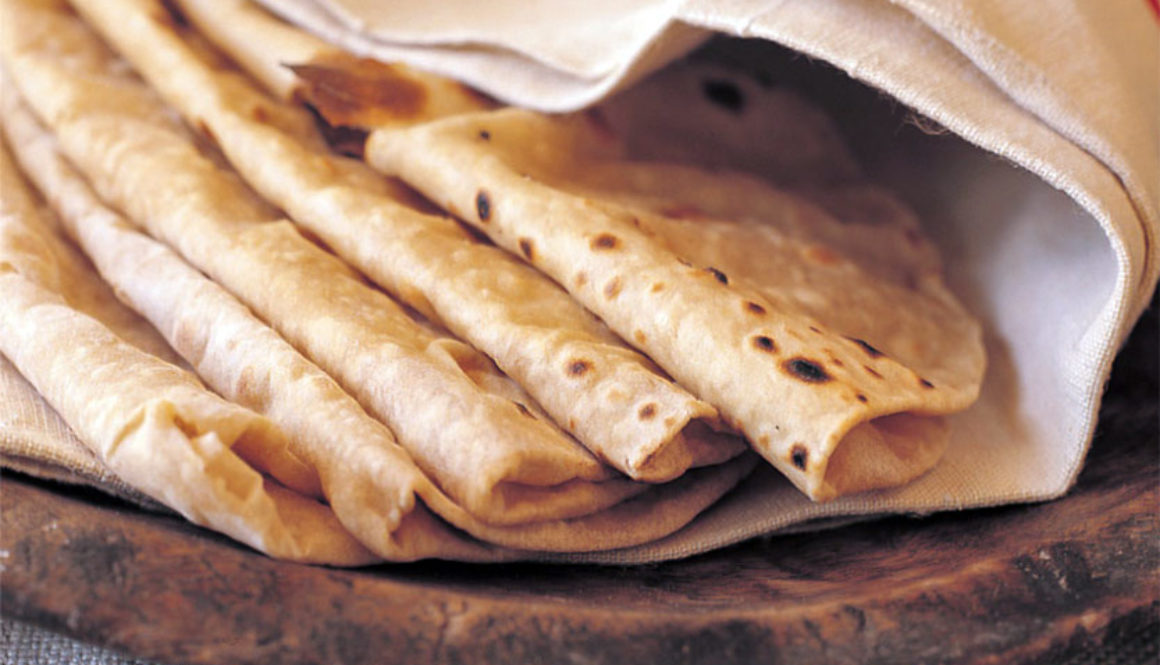
Making chapatis does take a little time, but to keep it manageable, my recipe makes only ten. Don’t be disappointed if your first attempts are far from perfect.
Makes 10
- 1½ cups whole wheat flour
- ½ cup all-purpose flour, plus extra for dusting
- 1 teaspoon salt
- 1 cup warm water
- 5 teaspoons unsalted butter, melted (optional)
You can either use a stand mixer or knead this dough by hand. Stir the two flours and salt together in a medium bowl until well mixed. Gradually add the water, using more or less as needed, mixing all the time (on low speed if using the mixer), until the dough comes together in a ball. Knead well in the mixer or on a flour-dusted work surface until the dough is smooth, elastic, and very pliant, about 10 minutes by hand, less if using a mixer. Set aside to rest, covered with a clean cloth or plastic wrap, for 10 minutes or up to 4 hours.
Divide the dough into 10 equal-sized balls. Dust a work surface with flour, and use your fingers to slightly flatten each ball of dough. Keep the balls of dough covered with a clean, dry cloth. Using a rolling pin, roll each one out into a round chapati about 5 inches in diameter. To achieve a perfect circle, rotate the chapati a quarter turn each time you roll. Dust with flour as you go.
Heat a dry, heavy skillet over medium-high heat until very hot (a drop of water should sizzle right off) and place a chapati on it. In about 1 minute, the surface of the chapati will form tiny bubbles; turn it over. After another minute, remove it and roast over an open flame. To do this, turn on a second burner to a medium-high flame. Using a pair of tongs, place the chapati, first side down, directly on the flame. (Don’t worry, the chapati will not burn; it cooks within a few seconds.) It should puff up like a balloon. When it is fully puffed, remove it immediately. If you like, smear it with a little butter.
If you don’t have a gas stove, then finish cooking the chapati on the skillet. You will miss out on the drama of the puffing bread, but the results will be the same. After you turn the chapati over the first time, cook it until it roasts slightly on the second side, 1 minute more. Then, using a balled-up kitchen towel, press down on the edges of the circle. This should cook the edges of the bread and make it puff up slightly. If you spy steam escaping from any puncture on the surface of the chapati, hold the kitchen towel down on that spot—this helps to trap hot air inside the bread, cooking it from inside. Don’t keep the bread on the hot skillet for too long, as this will overcook and dry out the bread, making it more like cracker bread!
Chapatis are best eaten right after they are made, but you can keep them up to 24 hours. Make sure to store the cooled breads in an airtight container or in a resealable plastic bag, separated by pieces of parchment. Reheat in the microwave, wrapped in a paper towel, or on a hot skillet.
NOTE: It is best to roll and cook the chapatis one at a time. If you roll them all out prior to roasting them, they will most definitely dry out. If you have access to aata, sometimes spelled “atta” (Indian whole wheat flour), please do substitute it here for both of the flours.
